Edge troubleshooting
How to fix white halos after background removal
To fix a white halo after background removal, first confirm that the pale line belongs to the cutout rather than the viewer. Put the saved PNG over light and dark backgrounds, compare the same edge with the original photograph, and repair only the affected area in an editor with mask or edge-color controls. A transparent file can still contain unwanted pale edge pixels.
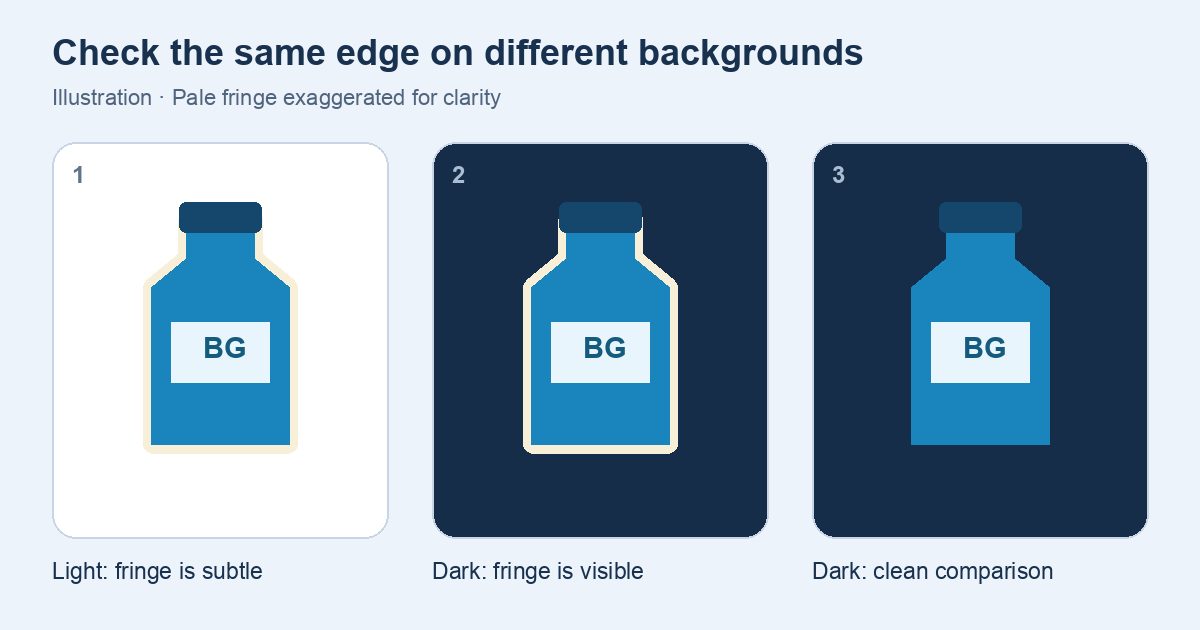
1. Set up a reversible comparison
Keep three files separate: the original photograph, the downloaded cutout, and an editable working copy. Open the working copy in an editor that supports layers and masks. The repair controls described here belong to that external editor; this guide does not imply that RemoveBGKit includes manual masking or color-decontamination tools.
Place a dark solid-color layer underneath the cutout, then change it to a light color. Use a third color close to the intended destination, such as a dark shop header. Do not merge these test layers into the cutout. Compare the same boundary on each background instead of judging different parts of the subject.
If the whole surrounding rectangle stays white, solve the transparency or export problem first. If the background shows through except for a narrow pale line, continue with the edge checks below. A checkerboard alone is not enough evidence: it may be part of a screenshot rather than transparency.
2. Identify what the pale pixels represent
A pale edge is not always leftover background. White hair, a shiny bottle rim, a reflected studio light and translucent fabric can all be legitimate parts of the subject. Compare the suspect area with the original at the same scale. Check whether the line follows a real highlight or forms an extra outline outside the intended boundary.
PNG stores color and transparency information separately when an alpha channel is present. Partially transparent edge pixels blend with whatever is behind them. Pale color in those pixels can therefore remain visible over a dark background even when the surrounding area is transparent. Saving the same pixels as PNG again preserves them; it does not decide which color belongs to the subject.
The W3C PNG specification describes alpha values from fully transparent through partially transparent to fully opaque. That explains why a good edge does not have to be a hard border of completely opaque pixels. Treat the distinction between unwanted color and necessary partial transparency as the key repair decision.
3. Choose a repair that matches the edge
For a solid product with an obvious strip of old background outside its outline, make a small, local mask adjustment. Work on a duplicate layer or editable mask. Keep the original visible nearby, change one setting at a time, and toggle the correction off and on. A repair is successful when the extra strip disappears without shrinking the real product.
For hair, fur, mesh or translucent fabric, avoid applying a strong inward mask adjustment to the whole image. It may remove the fringe by deleting the detail you wanted to keep. If your editor offers edge-color cleanup or decontamination, try it on a copy and compare the color as well as the silhouette. Tool names and behavior vary, so consult that editor’s documentation.
If the source is blurred or the subject blends into its background, there may not be enough information for a convincing repair. Return to a sharper original or photograph the item again with more separation from the background. Do not invent missing strands, labels or product contours merely to make the edge look smooth.
- Solid outline: remove only the excess outside the real boundary.
- Fine detail: preserve partial transparency and inspect color contamination separately.
- Unclear source: improve the source before making aggressive corrections.
4. Avoid fixing one background at the expense of another
A cutout that looks clean on white can still look pale on navy. Check both after every meaningful correction. Conversely, making the edge dark to suit navy may create a dark outline on a light layout. Keep a transparent master if the same asset will appear in several places.
GIMP’s Semi-flatten command illustrates a different, destination-specific approach: its manual says it combines partially transparent pixels with the selected background color while leaving fully transparent pixels alone. That can suit an image intended for that one background color, but it is not a universal transparent master. Do not apply an equivalent matte-color treatment without knowing where the image will be displayed.
For a fixed-background listing, you can instead create a separate flattened upload copy after checking the composited result. Retain the editable cutout. If the shop theme changes later, rebuild the upload copy from that master rather than trying to undo a baked-in background.
5. Check the final size and the actual exported PNG
At 100% zoom, one image pixel maps to one display pixel in editors that use that convention. This is useful for examining the edge, but the customer may see a much smaller thumbnail. Check both scales. A correction that looks tidy when enlarged may make a thin strap disappear at the final size.
Resize a copy to the intended output dimensions, then inspect the same repaired areas again. Save the transparent result with the test-background layers hidden, and reopen that saved file. Repeat the light-and-dark background comparison on the exported file, not only the working document.
If the halo appears only after uploading, compare the original download and the uploaded version in the same editor. Check whether the destination resized, flattened or otherwise changed the image before altering a master that already looks correct. A successful finish keeps real detail, removes the unwanted fringe on the intended background, and preserves a reusable original. No single mask setting can guarantee that result for every photograph.